We are now well on the way to getting our "LAMP" stack working. The Linux Apache MySQL and PHP mix of technologies for hosting websites is the most established and popular approach. The acronym describes the OS, Webserver, Database, and Programming language. This stack is not the only option. There are a multitude of different alternatives but given that it's the most proven, it's a good place to start. You may well ask why we didn't have to install Apache when setting up our development environment on Windows. Rather we used PHP's built-in webserver. While this webserver is fine for development, it has some limitations that make it unsuitable for a live website. Either way getting a LAMP stack up and running is an important step on the road to understanding how the entire internet works.
To install apache2 on your Linux OS type:
sudo apt install apache2on the command line. The Apache webserver doesn't come bundled with PHP. To install the PHP type:
sudo apt install php8.1Now to install the php module within Apache type
sudo apt-get -y install libapache2-mod-php8.1Dependency package management systems rely on archives in the cloud to store the packages they install. While apt has an official list of archives built-in which maintain the main packages that someone would require to use Linux it doesn't have everything. Sometimes we need to add an additional archive to the list of archives apt uses in order to source the packages we need. This is the case with PHP extensions.
ppa:ondrej is an archive is maintained by Ondřej Surý, a Debian developer who has been packaging PHP for Debian since PHP 5. It is generally well maintained and considered reliable and stable. To add this archive to the list used by apt type:
sudo add-apt-repository ppa:ondrej/phpNext, we need to add a list of PHP extensions that Laravel uses. You may recall us doing this when we set up our development environment on Windows in the "Getting Started" section. The extensions needed for Laravel 8.0 are PHP >= 7.3, BCMath PHP Extension, Ctype PHP Extension, Fileinfo PHP Extension, JSON PHP Extension, Mbstring PHP Extension, OpenSSL PHP Extension, PDO PHP Extension, Tokenizer PHP Extension, XML PHP Extension. If you are using a more recent version of Laravel you may have to check back on the Laravel website for a more up-to-date list as it grows with each new version of Laravel.
Some of these will have been installed automatically with PHP but just to be sure we will install them all with the following command.
sudo apt install php8.1 php8.1-cli php8.1-common php8.1-mysql php8.1-zip php8.1-curl php8.1-gd php8.1-mbstring php8.1-xml php8.1-bcmath php8.1-fpm php8.1-phpdbg php8.1-cgi libphp8.1-embed libapache2-mod-php8.1
Before finally testing that the Apache Webserver is up and running correctly, we need to enable the Apache PHP module and the Apache rewrite module. The Apache rewrite module allows Apache to take a web request URL and rewrite it in a way that suits the web application - in this case Laravel. This module is fundamental to how routing works in Laravel. To enable both of these modules type:
a2enmod php8.1 && a2enmod rewrite
The Apache "root" directory is /var/www/html. Any web applications we have will need to start here. To inspect our Apache webserver setup and ensure all the modules and extensions we installed are present and correct we need to have a phpinfo.php file located in this folder that we can view. This is a file that shows detailed settings for a working Apache installation and indicates which modules are loaded, enabled and working. If something is missing we'll see it here. To create this file type
echo "<?php phpinfo(); ?>" > /var/www/html/phpinfo.php
To get Apache to pick up on all the changes we've made we need to restart the Apache2 service. Remember a service is a program on a computer that sits running in an infinite loop, often listening for requests on a port, and processing jobs. To restart the service type
sudo systemctl restart apache2
Before we can access webpages served up by Apache we need to ensure that port 80, the default port for HTTP web traffic, and port 443 the default port for HTTPS traffic are open on the firewall. To do this type:
sudo ufw allow http && sudo ufw allow https
Now to visit your working Apache webserver go to your browser and type http://101.101.101.101/phpinfo.php but replace the IP address with that of your cloud server. You should see a page like this
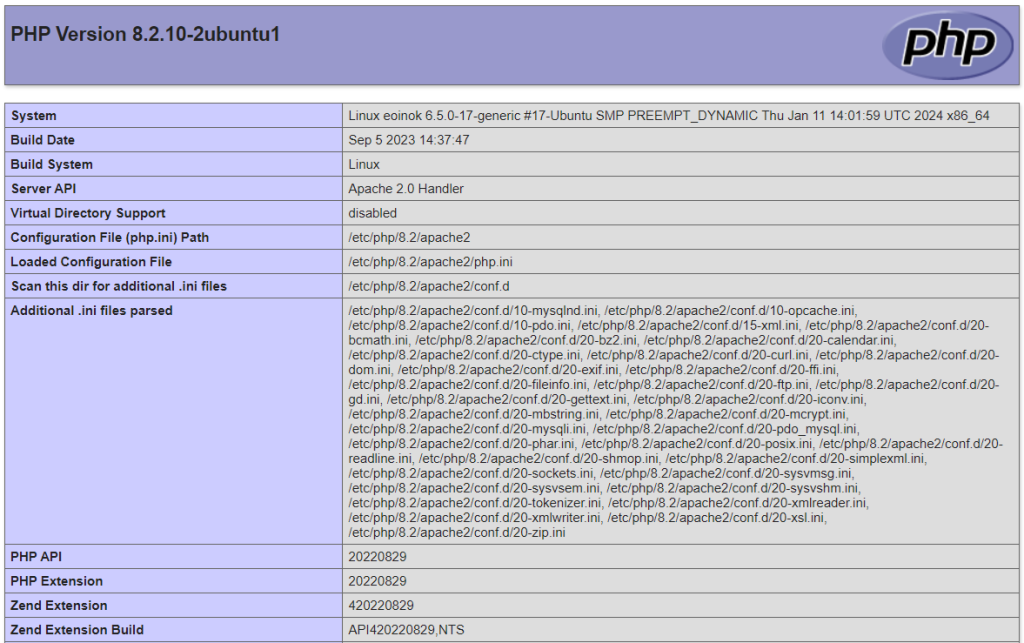
Do a CTRL-F on this page in your browser to bring up the Find dialog and do a search for rewrite to see if the rewrite module is enabled. There are more things we could search for but lets assume all went well for now. If there's a problem with your set up later you may have to come back to this phpinfo page later to check if certain modules are installed enabled and working. Next we'll install the MySQL database.