Once you are using Laravel mix to keep your plugins organised you will want to use it everywhere. Earlier we demonstrated an example of implementing Fullcalendar using <script> tags for each of the necessary assets. In this post I'll show you how to tidy it up and make sure it plays nicely with the other versions of plugins and tools that you may be using. To begin with we'll install Fullcalendar together with a minimal set of the plugins required to use it effectively. These include dayGridPlugin, timeGridPlugin, listPlugin and interactionPlugin. To install all these plugins simultaneously using node package manager type the following on the Command Line Interface
npm i @fullcalendar/core@6.1.4 @fullcalendar/interaction@6.1.4 @fullcalendar/daygrid@6.1.4 @fullcalendar/timegrid@6.1.4 @fullcalendar/list@6.1.4
To make webpack import these modules and set them up in app.js and app.css for use in a Laravel view we need to add a number of lines to resources/app/js. To ensure this file stays organised we'll put all the lines into a separate file and then pull them in to app.js. To do this place the following lines in a file called resources/js/calendar.js
import { Calendar } from '@fullcalendar/core';
import dayGridPlugin from '@fullcalendar/daygrid';
import timeGridPlugin from '@fullcalendar/timegrid';
import listPlugin from '@fullcalendar/list';
import interactionPlugin from '@fullcalendar/interaction';
window.FullCalendar = Calendar;
window.dayGridPlugin = dayGridPlugin;
window.timeGridPlugin = timeGridPlugin;
window.listPlugin = listPlugin;
window.interactionPlugin = interactionPlugin;
Then to pull them in to app.js for use with webpack add the following line to the bottom of resources/js/app.js
require('./calendar');
You are now ready to build Fullcalendar into public/js/app.js so that it will be available from within blade views. To do this run the following command in the CLI
npm run dev
To make this work we need to add the code for the controller, the route and the view. First save the following code to app\Http\Controllers\calendarController.php
<?php
namespace App\Http\Controllers;
use Illuminate\Http\Request;
class CalendarController extends Controller
{
    public function display()
    {
        return view('calendar.display');
    }
}
?>
Add a corresponding route to routes\web.php
Route::get('/calendar/display', 'App\Http\Controllers\calendarController@display')->name('calendar.display');
Finally, add the following code to resources\views\calendar\display.blade.php
@extends('layouts.app')
@section('content')
<div id="calendar"></div>
<script>
  document.addEventListener('DOMContentLoaded', function() {
    var calendarEl = document.getElementById('calendar');
    var calendar = new FullCalendar(calendarEl, {
      plugins: [ dayGridPlugin, timeGridPlugin, listPlugin, interactionPlugin ],
        initialView: 'dayGridMonth',
        headerToolbar: {
            left: 'prev,next today',
            center: 'title'
        },
        slotDuration: '00:10:00',
        defaultDate: '2023-02-22',
        editable: true,
        events: [ { title: 'All Day Event', start: '2023-02-20' },
                   { title: 'Long Event', start: '2023-02-22', end: '2023-02-23' } ]
      });
     calendar.render();
  });
</script>
@endsection
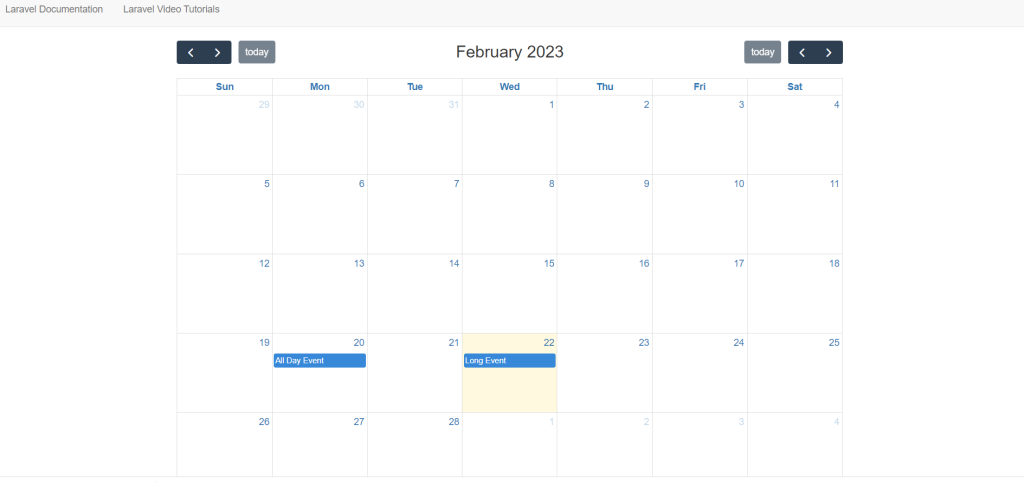
Now when you visit http://localhost:8000/calendar/display you will see the Fullcalendar plugin displayed.